Data
The Data window lets you create all materials and all piping sections of the model.
It also lets you select one or more predefined specifications.
1. New project
When starting a new model, the Data window opens :
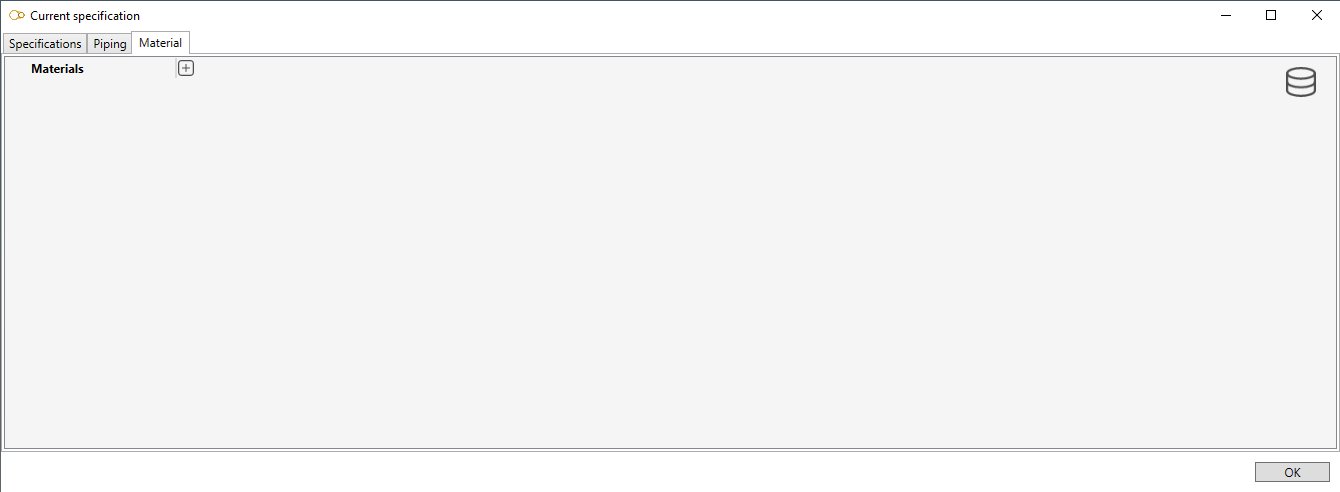
1.1 Material definition
Let’s define a new material.
Click on the + button and enter the description of the new material (Ex : My material).
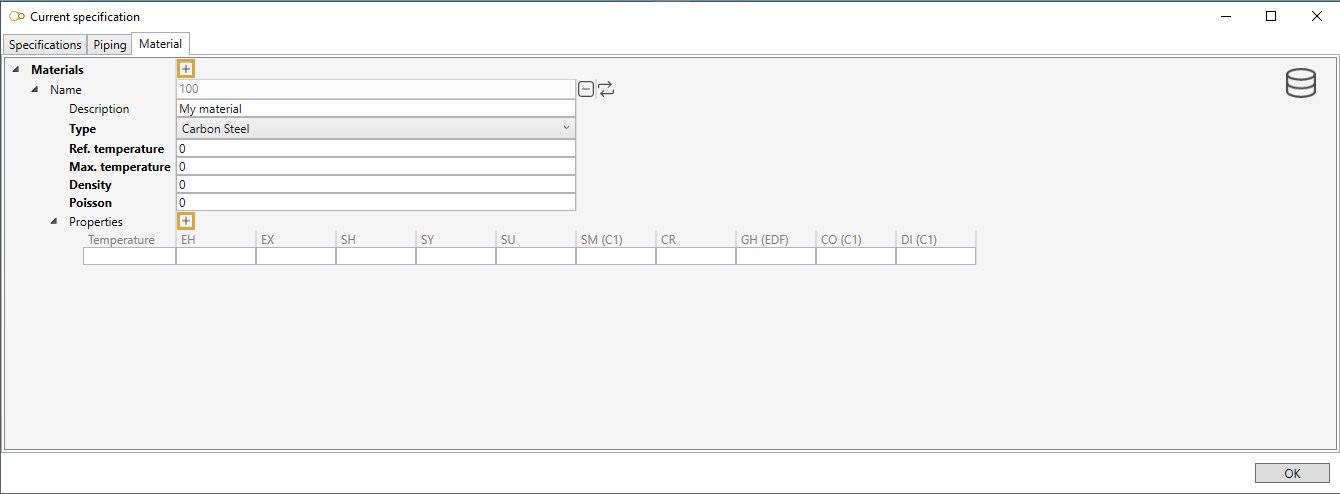
A new name has been created for this material (Ex : 100).
Click on the - button (next to Name) to remove it.
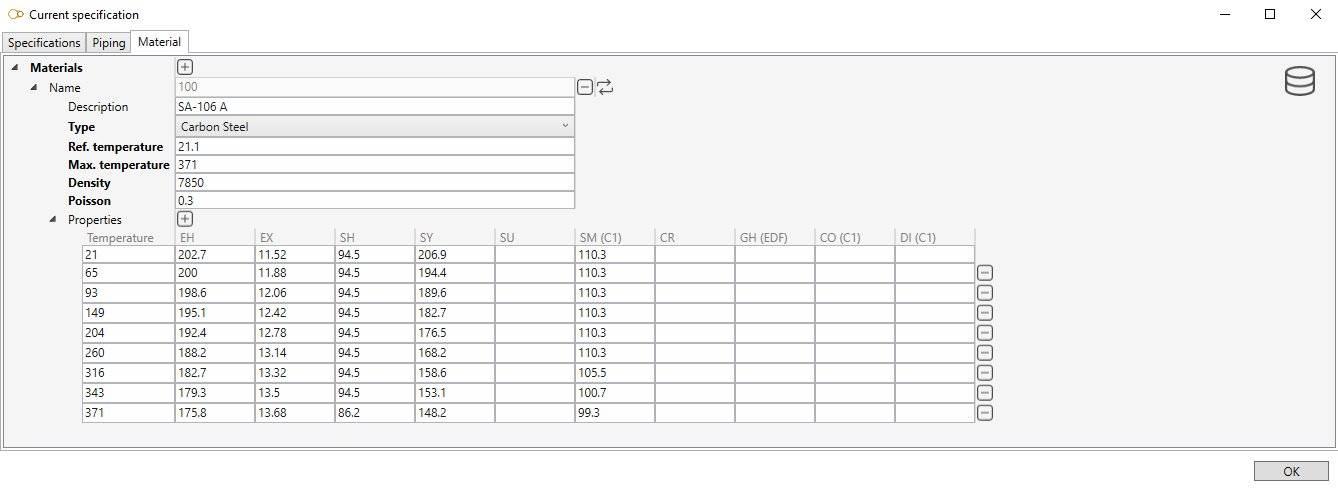
Define the description, type, max temperature, density and Poisson’s ratio.
Click on the + button (next to Properties) to add a new row of properties for a given temperature or click on the - button (end of row) to remove one.
| Property | Description | Unit Metric | Unit USA |
|---|---|---|---|
| Max. temperature | Max Temperature | °C | °F |
| Density | Density | kg/m³ | lb/ft³ |
| Poisson | Poisson’s ratio | - | - |
| EH | Modulus of Elasticity | kN/mm² | 10^6.psi |
| EX | Thermal Expansion | 10^-6.mm/mm/°C | 10^-6.in/in/°F |
| SH | Non-Class 1 Allowable Stress | N/mm² | ksi |
| SY | Yield Stress | N/mm² | ksi |
| SU | Ultimate Tensile Stress | N/mm² | ksi |
| SM | Class 1 Allowable Stress | N/mm² | ksi |
| CR | Creep Stress | N/mm² | ksi |
| GH | Shear Modulus (composite only) | kN/mm² | 10^6.psi |
| E2 | Circumferential Modulus of Elasticity (composite only) | kN/mm² | 10^6.psi |
| CO | Thermal Conductivity (Class 1) | kJ/hr/m/°C | btu/hr/ft/°F |
| DI | Thermal Diffusivity (Class 1) | mm²/s | ft²/hr |
See Units for more information.
ATTENTION, temperatures must be entered in ascending order!
Properties of High Density Polyethylene materials (HDPE) also depend on load duration. The properties are built-in for 5 different specifications :
- ISO : EN 15494:2015 with coefficient = 1.25
- ASTM : ASTM with factor = 0.63
- ASME : ASTM with factor = 0.5 (= values given in Appendix XXVI)
- EDF1 : guide EDF D305914006648 [E]
- EDF2 : guide EDF D305921021240 [A]
- EDF3 : guide EDF D305921021240 [B]
The user has to enter the density, Poisson’s ratio’ and thermal expansion coefficient, which are supposed to be constant.
Properties of RCC-MRx materials are built-in for 5 different specifications :
- A3.18AS : X10CrMoVNb9-1 RM 242-2 & 243-1 (P91)
- A3.1S : X2CrNiMo17-12-2(N) (316L(N))
- A3.3S : X2CrNiMo17-12-2, X2CrNiMo17-12-3 and X2CrNiMo18-14-3 (316L)
- A3.4S : X2CrNi18-9 & X2CrNi19-11 (304L)
- A3.8S : X4CrNiMo16-05-01
To save time, you can also directly select a material from database :
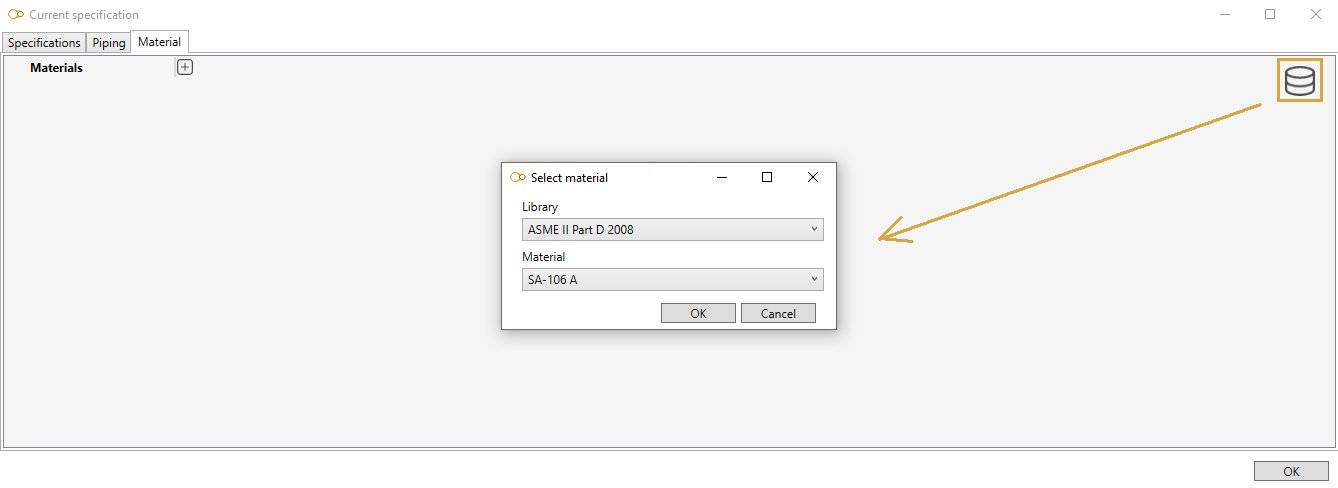
Click on the Database button, select a Library and a Material. The tables will be filled in automatically :
Only libraries with Target = Piping will be shown !
Click here for more information about creation of library of materials.
1.1.1 Class 1 materials
In Class 1, materials can define a Fatigue curve :

User can define the number of cycles for every stress step.
Add a curve point by clicking on the + button and remove one by clicking on the - button.
The stresses must be entered in ascending order!
1.1.2 RCC-MRx materials
RCC-MRx materials can be inspected :
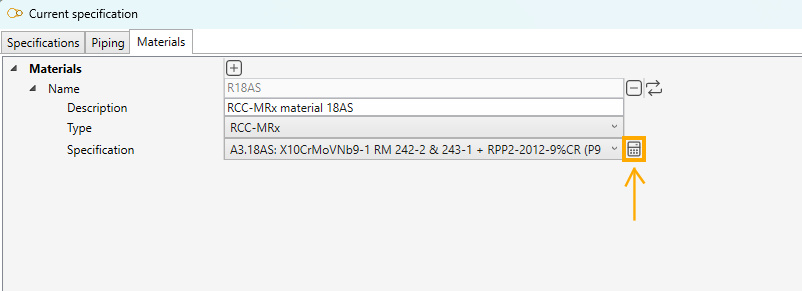
The inspector opens :
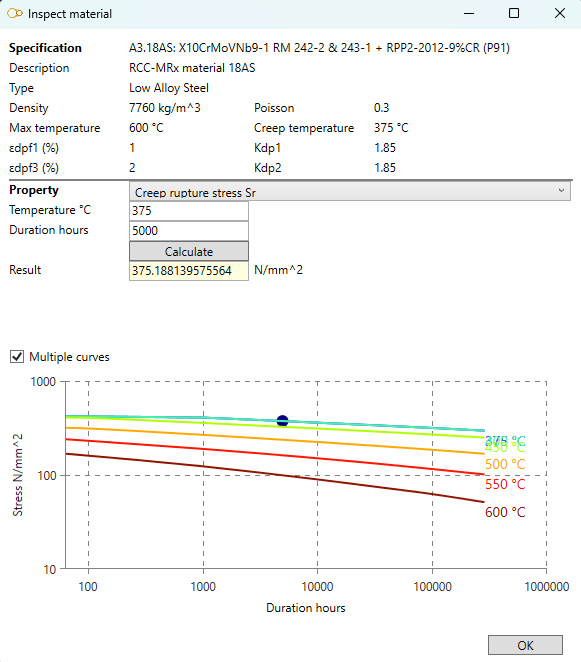
It shows all properties, curves and let the user calculate a property with specific parameters.
RCC-MRx properties :
- EX : Thermal expansion coefficient
- EH : Young modulus
- CO : Thermal conductivity
- DI : Thermal diffusivity
- SY : Minimal yield strength
- SU : Minimal tensile strength
- SM : Allowable stress
- K and m: coefficients of monotonic tensile stress-strain curve (σ/K)^1/m
- Monotonic tensile stress σ
- K and m: coefficients of cyclic tensile stress-strain curve (σ/K)^1/m
- Cyclic tensile stress σ
- Coefficient Kε
- Coefficient Kν
- Symmetrisation coefficient Ks
- Fatigue curve
- Efficiency diagram
- Negligible creep curve
- Creep allowable stress St
- Creep rupture stress Sr
- Primary creep coefficients K, x, y
- Secondary creep coefficients C, n
- Negligible creep curve (inverted)
- Creep allowable stress (inverted)
- Creep rupture stress (inverted)
- Fatigue curve (inverted)
1.2 Piping definition
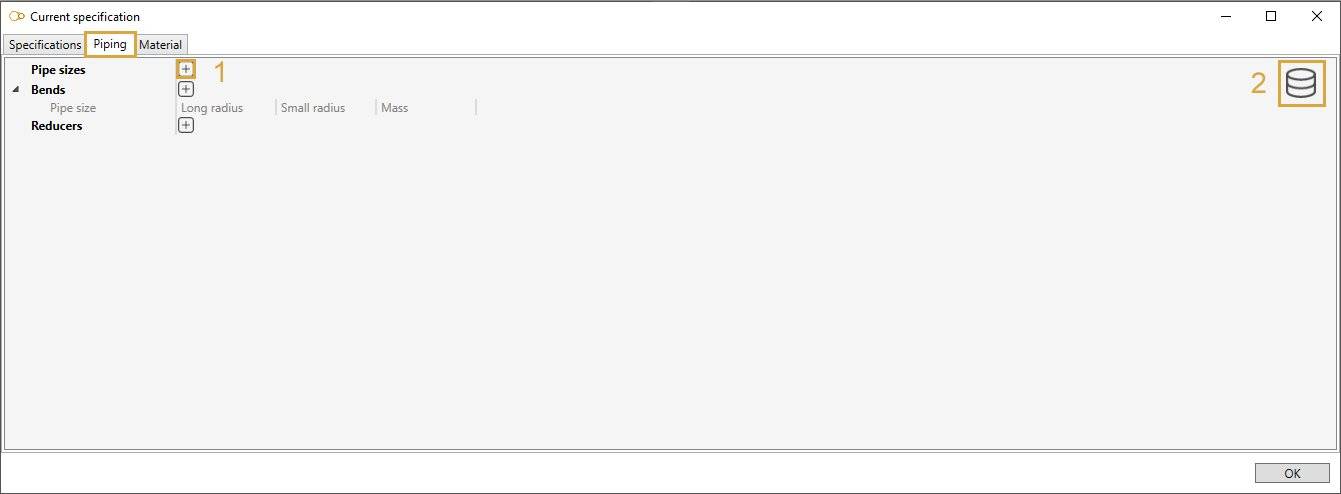
To add new pipe sizes, click on + button (1) and give it a name (Ex : 4”).
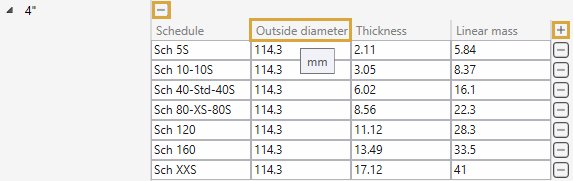
Each size exists in different schedules. click on + button to add schedules :
| Property | Unit Metric | Unit USA |
|---|---|---|
| Schedule | - | - |
| Outside diameter | mm | in |
| Thickness | mm | in |
| Linear mass | kg/m | lb/ft |
To know the UNIT of a property, just let the mouse over the property name.
For example : mm for the Outside diameter
ATTENTION, the name of the pipe size is very important (Ex : 4”). It will be used as a reference for all other piping elements.
ATTENTION, the sizes must be defined in an ascending order.
To add bend properties for each pipe size, click on + button and select a pipe size :
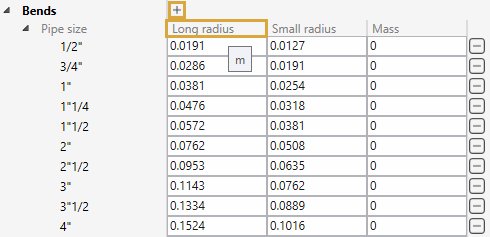
Standard radius and mass can be entered :
| Property | Unit Metric | Unit USA |
|---|---|---|
| Long radius | m | ft |
| Small radius | m | ft |
| Mass | ton | kips |
ATTENTION, for a better readability, we recommend to enter the sizes in ascending order.
To add reducer properties for each pipe size, click on + button and select a pipe size :
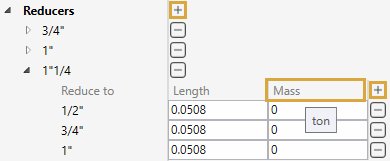
Click on + button (next to Mass) to add all possible reduction from the current size to a smaller one.
Length and mass can be entered :
| Property | Unit Metric | Unit USA |
|---|---|---|
| Length | m | ft |
| Mass | ton | kips |
ATTENTION, for a better readability, we recommend to enter the sizes in ascending order.
To save time, you can also directly select a pipe size from database (2) :
Select a Library, a Pipe size and a Schedule. The tables will be filled automatically :
Click here for more information about creation of library of piping elements.
Finally, you can define the sections of the model by defining pairs of Piping size/Material + special properties of the project.
Click to + button and select pipe sizes (Ex : 4”) :
For each size, define the schedule and the material. A pipe knows now its section and its material.
Select then the node connections of the pipe, which depend on the material :
Steel
- None
- Butt weld - flush
- Butt weld - as welded
- Fillet weld
- Full fillet weld
- Threaded
- Brazed
Composite
- None
- Bell and spigot adhesive bonded
- Bell and spigot adhesive bonded with laminated fiberglass overlay
- Bell and spigot gasket with laminated fiberglass overlay
- Butt and strap
HDPE
- None
- Concentric fabricated reducer
- Thrust collar
- Electrofusion coupling
- HDPE bolted flange
You may define the mismatch for butt-weld as welded connections, and the fillet length for fillet weld connections [mm or in].
Select then the Long weld type of the pipe between :
- None
- Butt weld flush (steel only)
- Butt weld as welded (steel only)
Based on this property, define the Long weld mismatch [mm or in].
Other properties :
| Property | Unit Metric | Unit USA | Default |
|---|---|---|---|
| Linear mass + insulation | kg/m | lb/ft | Linear mass of the pipe |
| Insulation thickness | mm | in | 0 |
| External corrosion | mm | in | 0 |
| Internal erosion | mm | in | 0 |
| Bend thickness | mm | in | Thickness of the pipe |
The linear mass of the pipe can also be calculated more precisely by clicking on the button :

You can manually specify the density of the pipe material, the thickness and density of the insulation (0 by default), the thickness and density of the jacket (0 by default) and eventual additional mass (0 by default).
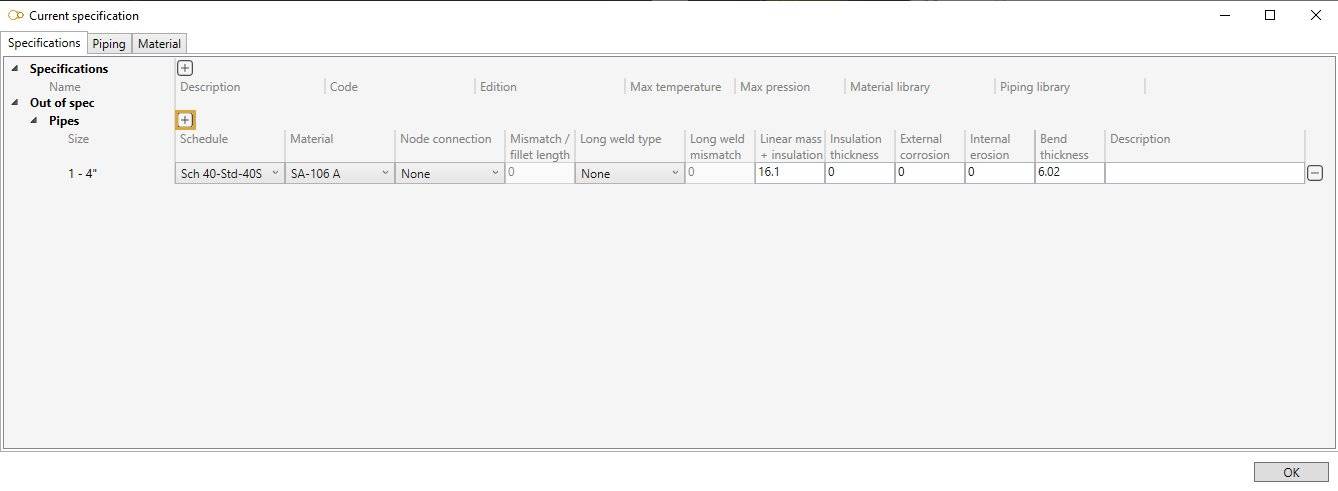
1.3 Spec driven mode
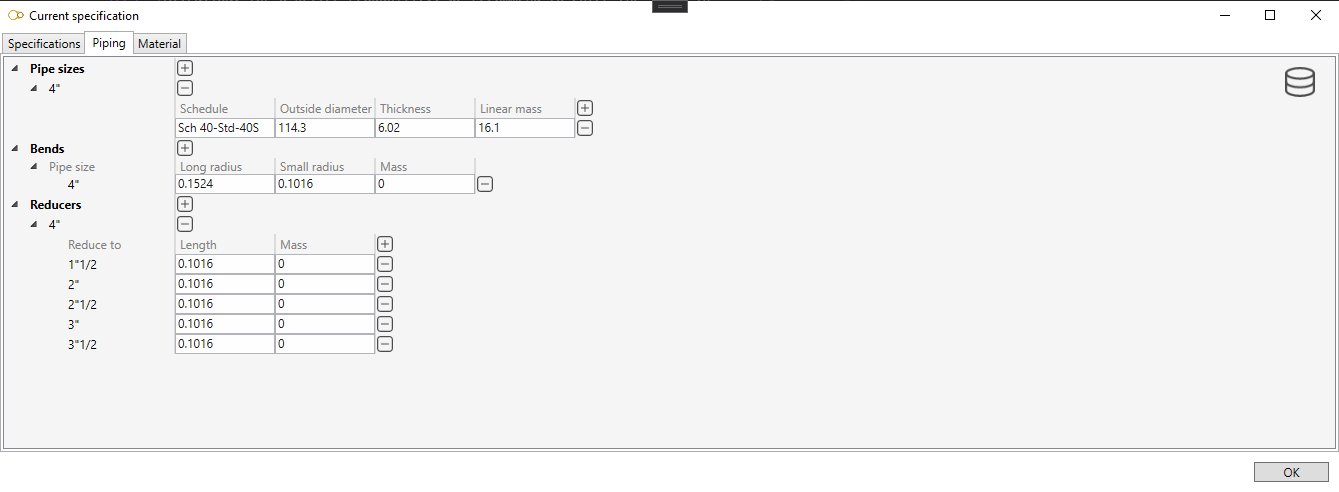
Another way to define Materials and Piping elements is to use a predefined Specification.
The goal of a specification is to supervise the engineer’s work by predefining all piping elements, sections, materials, bend radius, reducer lengths, tees…
Click on + button and select a specification :
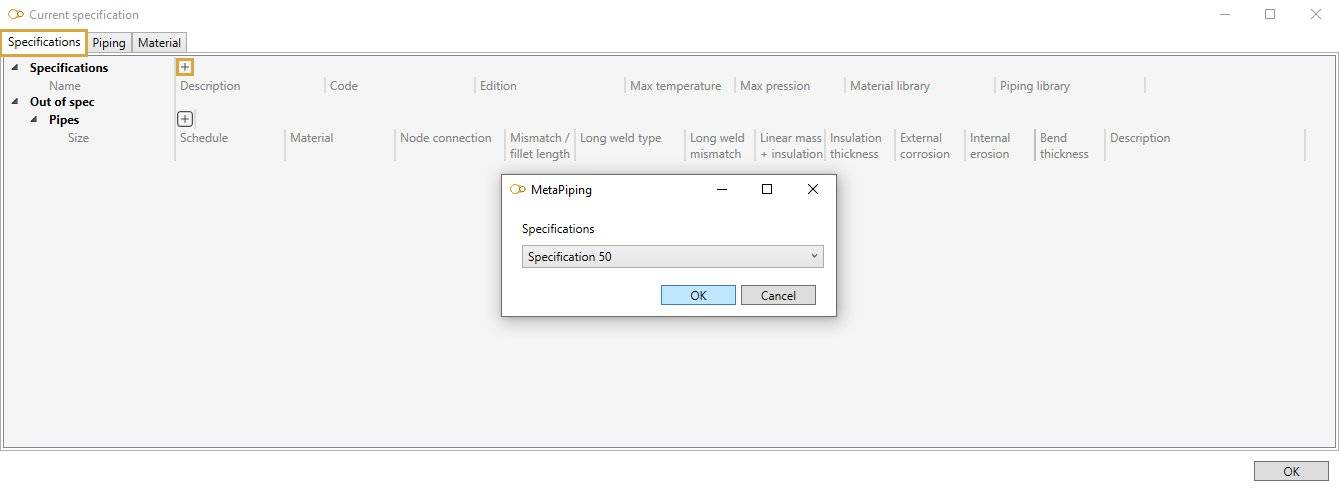
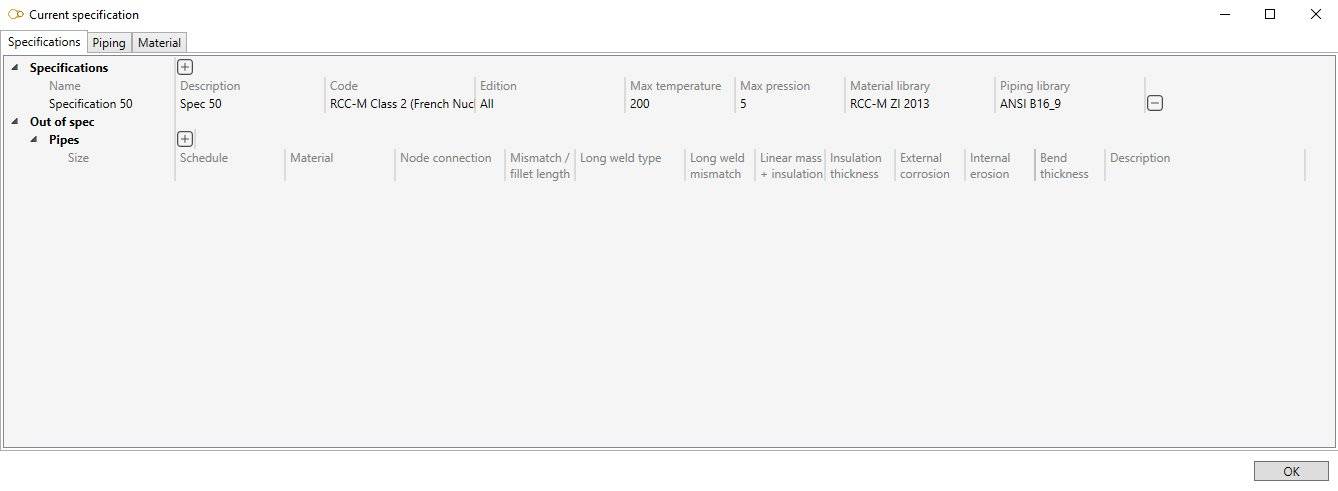
Click here for more information about creation of specification.
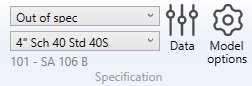
Now, you can use these 2 dropdown lists to select the current section :